


 Gorf Repair Log
|
|
| Gorf Repair Log |
 |
Gorf
arrived in the Repair Station after almost 25 years in storage! The game turned on but
multiple problems were evident. The power board was checked and the +5
voltage was found to be low. Several cracked solder joints were found
on the header pins and they were reflowed. Once everything was soldered
the +5 came back nicely and was very strong. Everything was reconnected
only to have a slow blow fuse on the transformer blow! |
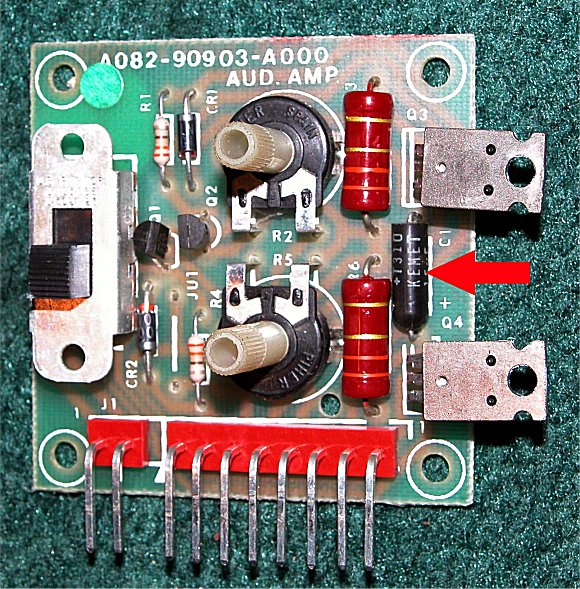 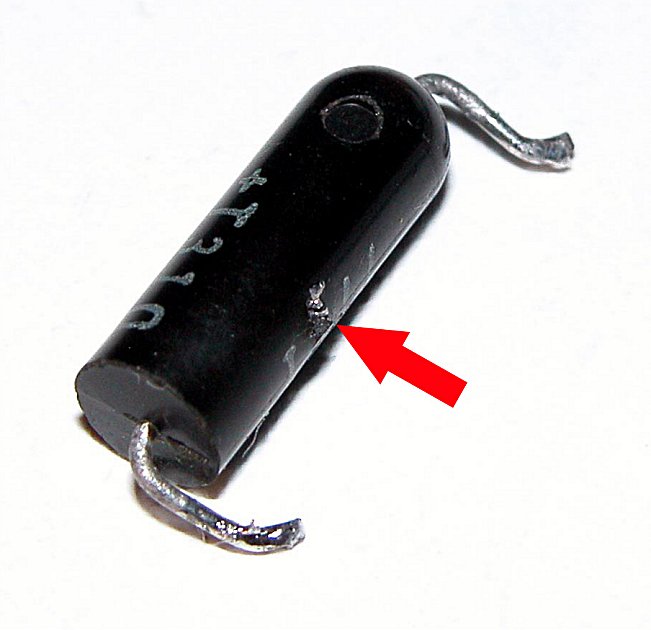 |
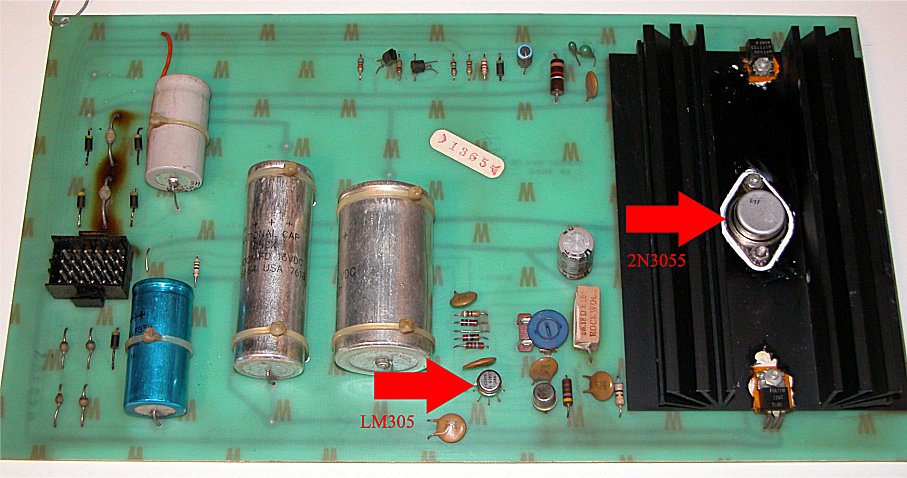
It turns out that a shorted Kemet 15uf 20 volt tantalum capacitor on the audio amp board caused the fuse to blow. The capacitor appeared fine but when tested on the board it read a dead short. Once the capacitor was removed you could actually see where it failed and burst! Since Kemet is still in business, a new capacitor was ordered and installed.t there was a shorted Kemet 15uf 20volt tan |
 |
The game was now
able to power up and an image appeared on the screen; however, the
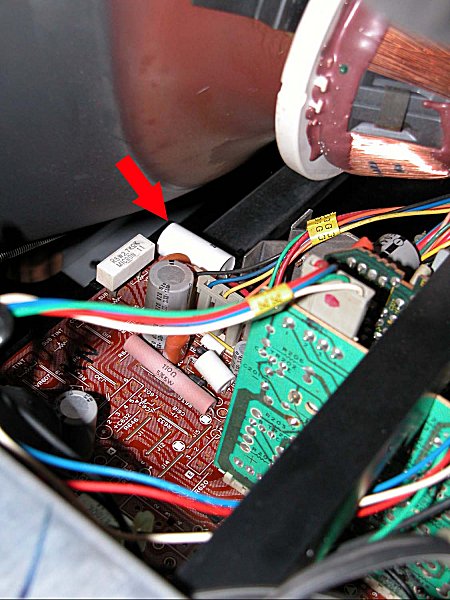
monitor blinked rapidly with an audible clicking sound. The monitor
chassis is a Wells Gardner 4600 and this is a known problem that can be
encountered even after you have done a cap
kit. The fix is to replace the capacitor at location C621 on the main
PCB of the chassis. The capacitor is a 0.10uf 1600volt polypropylene
film capacitor. It is the large white capacitor in the corner of the
board.
|
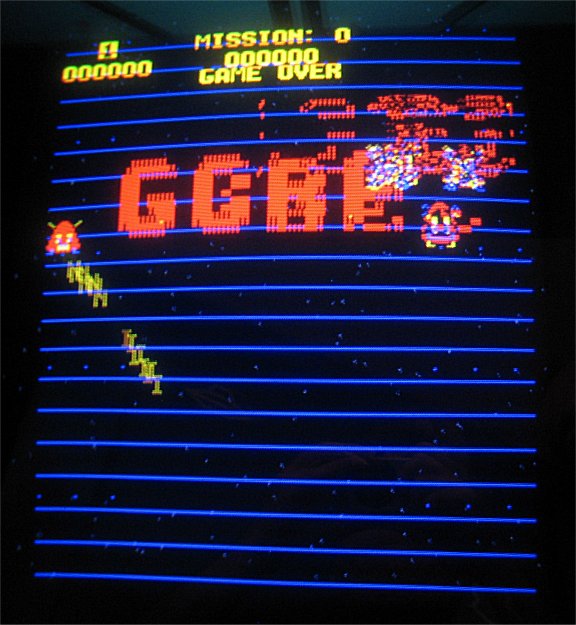 |
Once I corrected the blinking monitor I was now able to see what was being displayed on the screen. The game was going through the normal attract sequence but there were obvious graphic problems as wells as rows of horizontal blue lines. As soon as a game was started, all of the player's ships exploded immediately and game play lasted only a few seconds. Click here to see a movie of the graphics glitch as well as the exploding ships. |
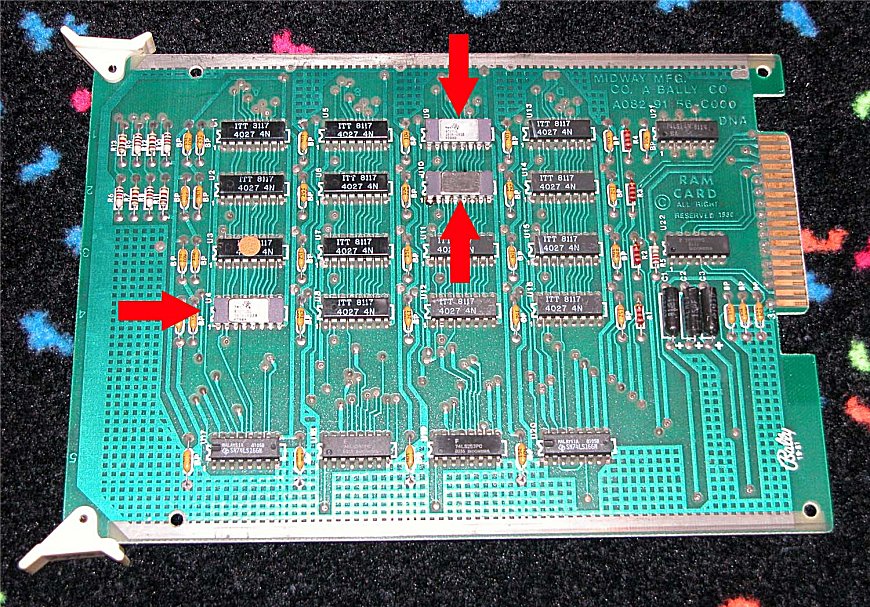 |
The vertical lines were caused by bad
RAM. Three bad RAM
chips were located on one of the two RAM boards. 4027 RAM's were
replaced at locations U4, U9 and U10 as shown on the picture to the
left. The new RAM also seemed to slightly 'improve' the exploding ship
problem as well. |
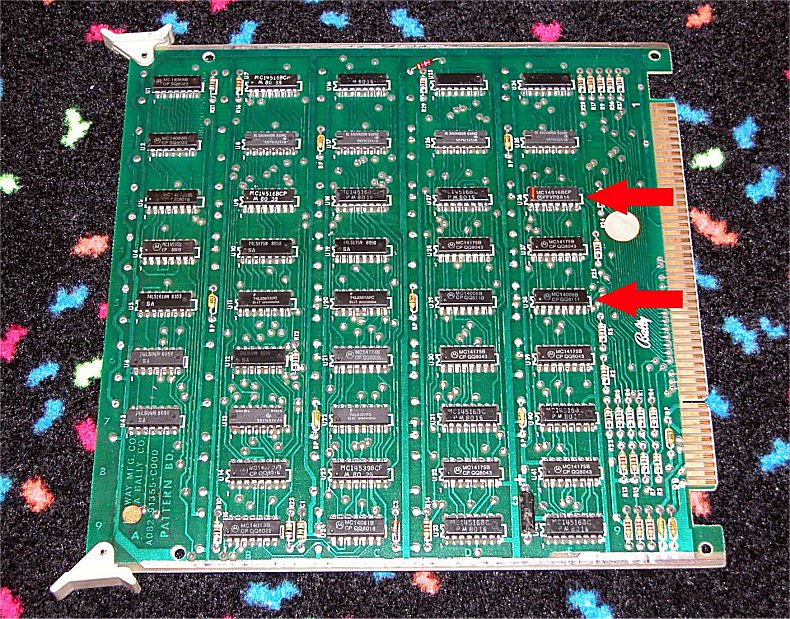 |
Once the RAM was corrected it was on to the Pattern Board to find out what was causing my graphical display problems. Diagnosing the pattern board is a very tedious process and one tool that is a must is a logic probe set to CMOS. Eventually I was able to find pin #10 stuck low on chip U38 (MC14008) which fed pin #4 on chip U36 (MC14516). I replaced both chips and my graphical error as well as the ship exploding problem both were gone! |
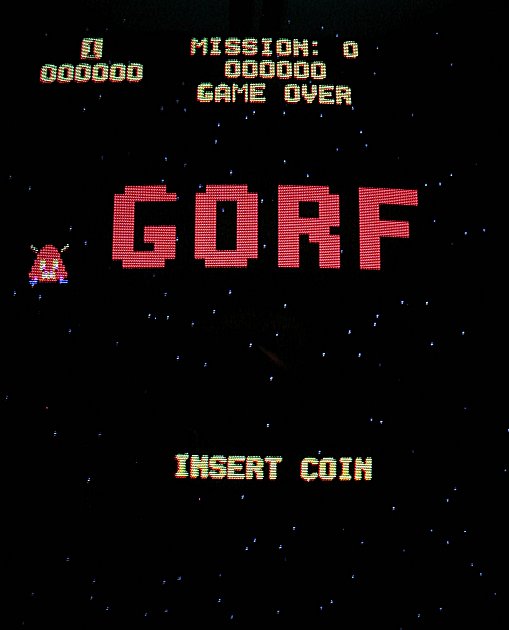 |
After a lengthy clean up process I was ready to play some Gorf. Nice repair Space Cadet! |