


 Ms.
Pac-Man Repair Log
Ms.
Pac-Man Repair Log|
|
| Ms.
Pac-Man Repair Log |
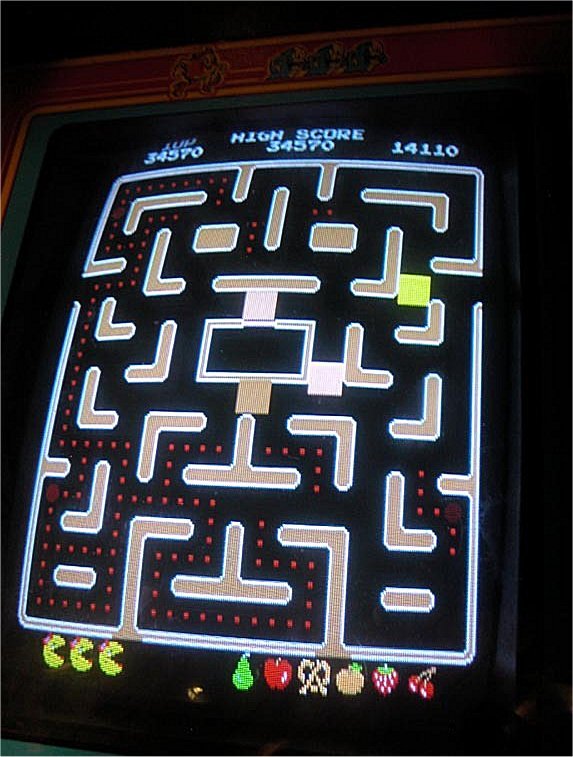 |
I acquired a "project" Ms. Pac-Man and what a project it turned out to be! The game played fine but the characters looked like blocks. The game was powered down and the PCB was taken out. ROM 5F was removed and cleaned. A new socket was installed and the chip was reseated. The PCB was reinstalled and game was powered back up. Ms. Pac-Man and the ghosts now looked as they should! |
 |
After playing the game for a while, the picture soon developed a curl. The G07 chassis was removed and cleaned. A cap kit as well as new pots were installed. The chassis was put back in and the game was turned on. The curl was gone but the game was now acting flakey.
|
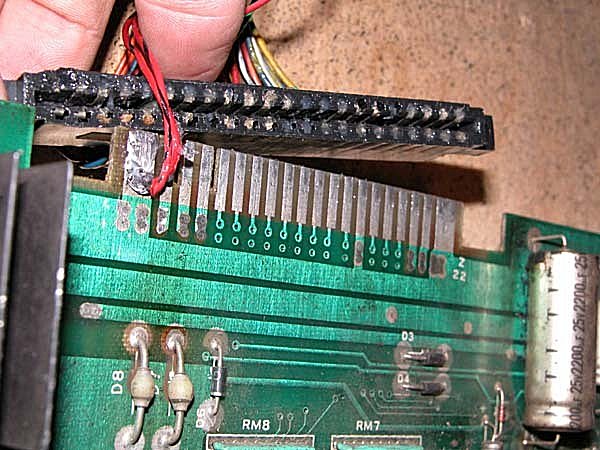 |
I checked the power cord and noticed that the ground pin was cut. I replaced the cord and inspected the power brick assembly as well as the power supply board. Everything looked fine until I got to the edge connector molex. It was a horrendous mess! It looked like someone tried to fix an intermittent connectivity problem by shoving toothpicks in the connector! I cut the edge connector off and replaced it with a new one. |
 |
I
connected the PCB
to the
new edge connector and closed the game back up. I turned the
game back on and played it for quite a while. It worked great but
experienced occasional "twitching" that appeared to be attributable to
a decrease in voltage. Although the power supply appeared to be
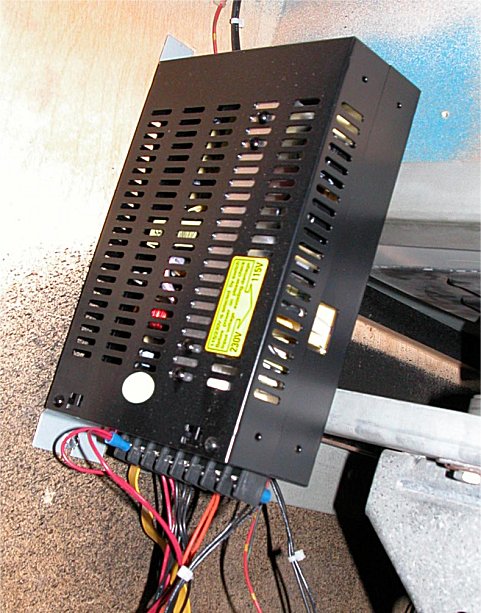
functioning properly upon my initial inspection, I decided to replace
it
with a switching power supply commonly known as a "switcher." |
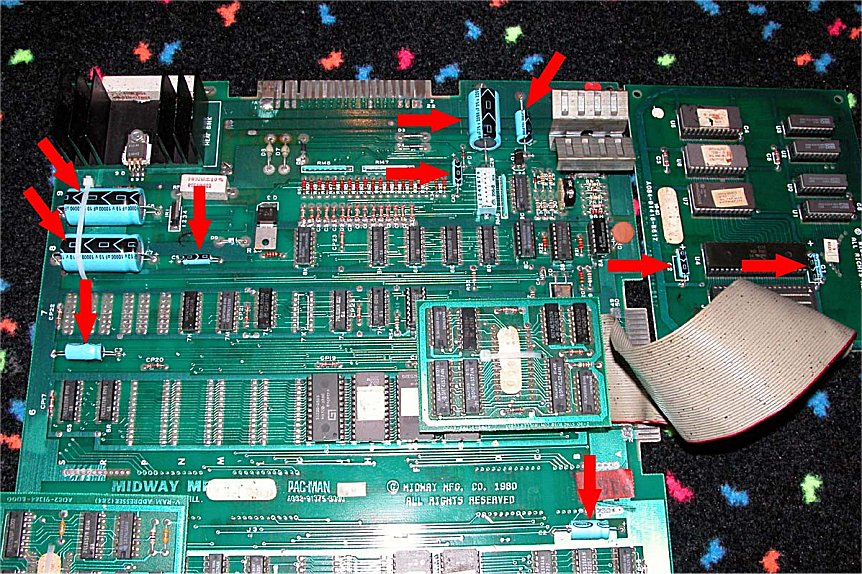 |
After completing the switcher install, the game now ran
smoothly!
However, the game soon developed a sound problem. A very loud
hiss could now be heard. It sounded like static from an old AM
radio. A little
research showed that the problem was most likely caused by three
capacitors located near the heat sink on the PCB. I removed the PCB and
unsoldered the caps in
questions - C5, C7 and C8. Since the three capacitors came
as part of a cap kit, I installed the rest of the capacitors
and replaced the PCB. Turning on the game produced the
desired result immediately - no more hiss! The game sounds were
now loud and clear! |
 |
One last step remained - the thing that bugged me the
most!
At one time, someone had replaced the original joystick with an ugly
universal joystick. I acquired an original
Ms. Pac-Man joystick and installed it as well as a new centering grommet. Finally, Ms.
Pac-Man was almost done. I added new locks and an original
coin box with lid to finish the project. th Look out ghosts!
|