


 Thief
Repair Log
Thief
Repair Log|
|
| Thief
Repair Log |
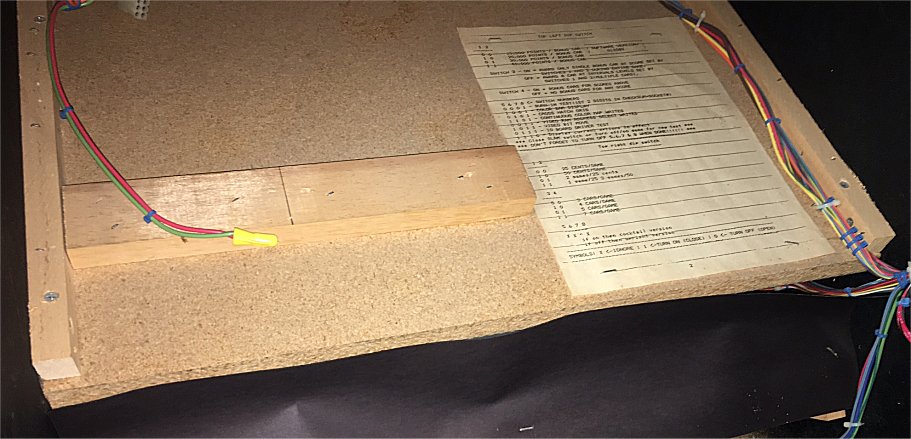 |
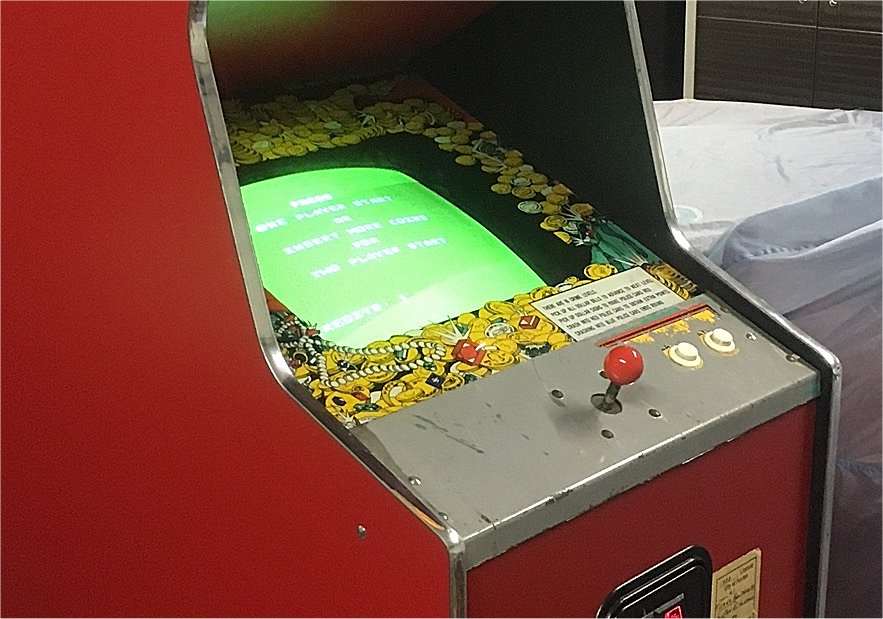
Thief arrived in the Repair Station with several problems. One obvious problem was the original cassette player was missing. Trying to acquire a 35+ year old working car stereo with an auto-reverse cassette player proved futile so I decided to install a MP3 player. Luckily all the original wiring was still in the game so it was just a matter of purchasing a MP3 player and then building a harness. |
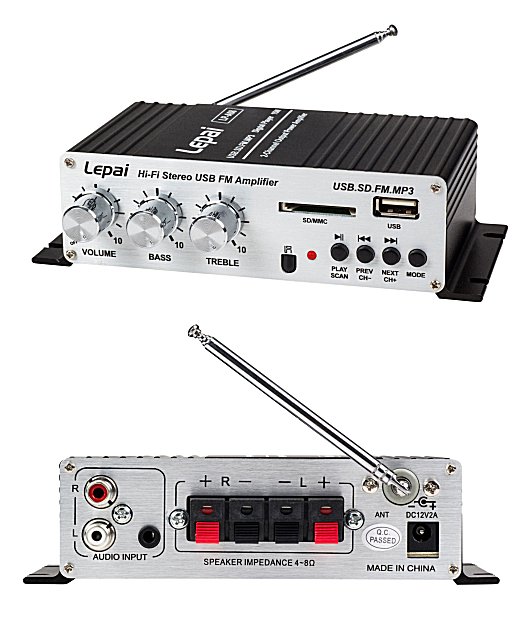 |
I decided to
purchase a Lepai LP-A68 stereo amplifier since it met the
specifications required by the game and was readily available on E-Bay.
The unit is a two channel amplifier that has inputs for both SD cards
as well as USB devices. |
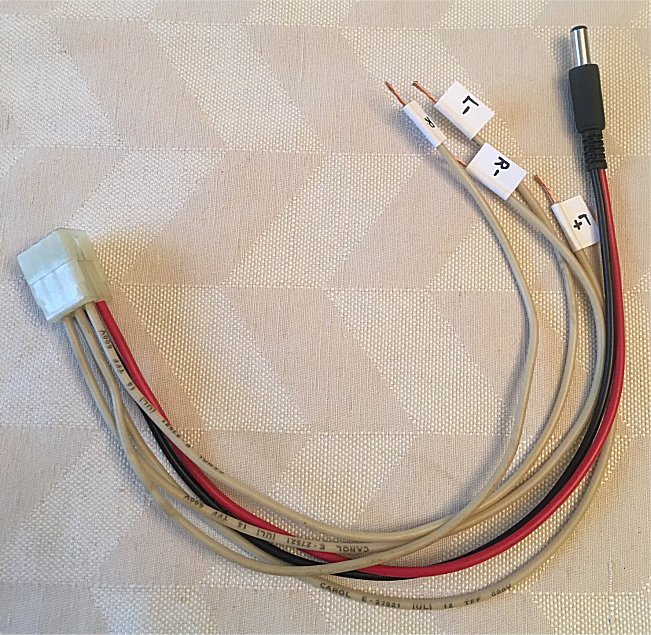 |
The goal was to install the new MP3 player without modifying the original game harness in any way. I was able to find a matching 6 pin molex connector in my parts stash and various colors of stranded 18 AWG wire to begin construction of the MP3 player harness. I used the original schematic as a guide for the wiring and installed .093" male crimp pins into the molex. I labeled each wire of the harness for the speakers and installed a 12V DC power jack to fit directly into the MP3 player. It turned out great!! player without hacking the original game harness in any way. I was able to find a 6 pin matching molex connector in my parts stash and various colors of stranded 18AWG wire to begin construction of the MP3 player harness. I used the original schematic as a guide for the wiring and installed 0.093 male crimp pins into the molex. I labelled each wire of the harness for the speakers and installed a 12V DC power jack to fit directly into the MP3 player. Turned out great! |
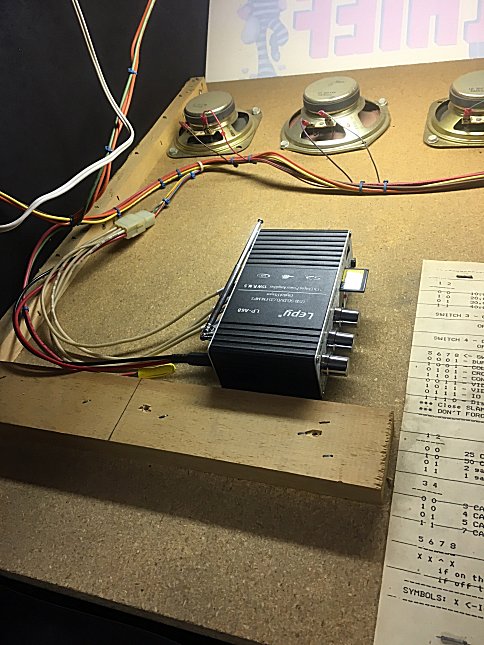 |
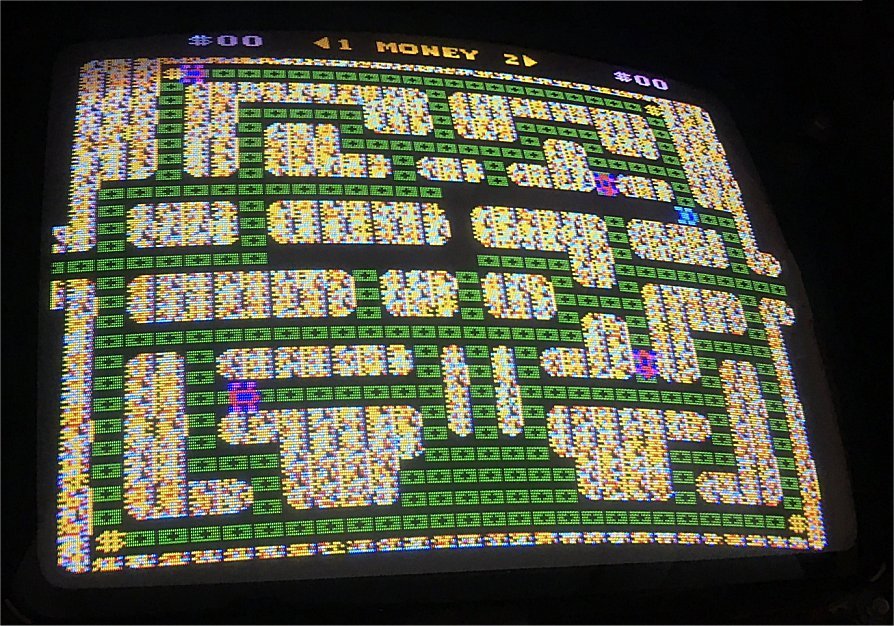
I found the proper audio file online and copied it to a spare SD card. I installed the harness and MP3 player in the game and turned it on. Success! The "police chatter" could now be heard and the "crash sounds" came on at the appropriate times. A very unique feature! "CALLING ALL CARS........CALLING ALL CARS!" |
       |
Once all the repairs were made I
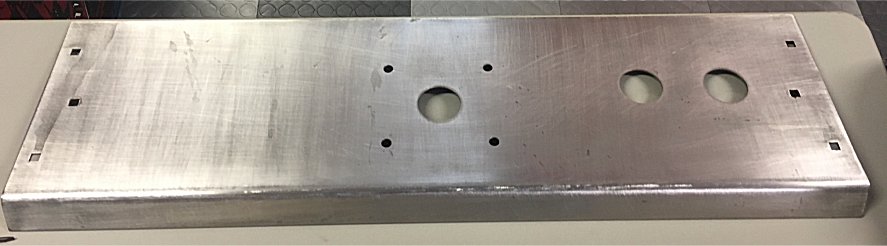
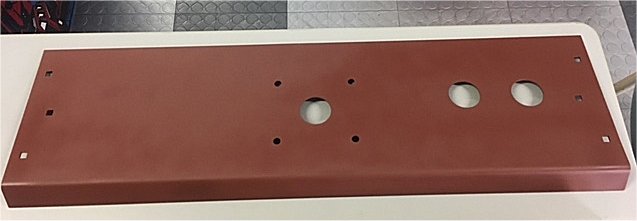
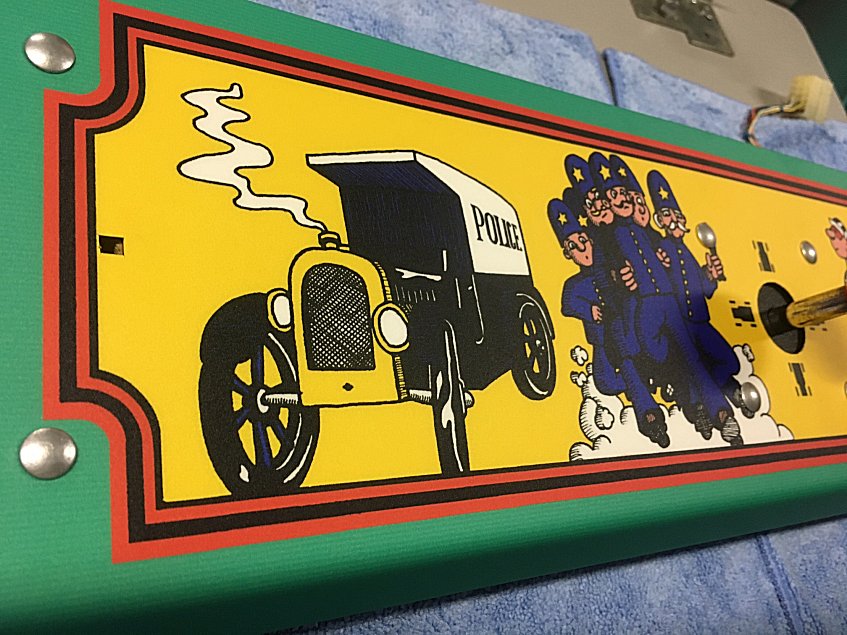
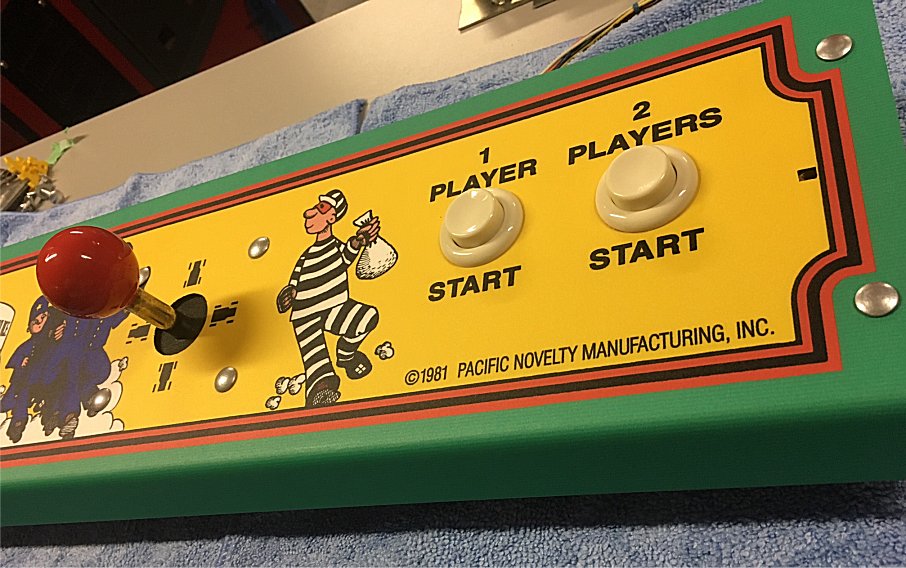
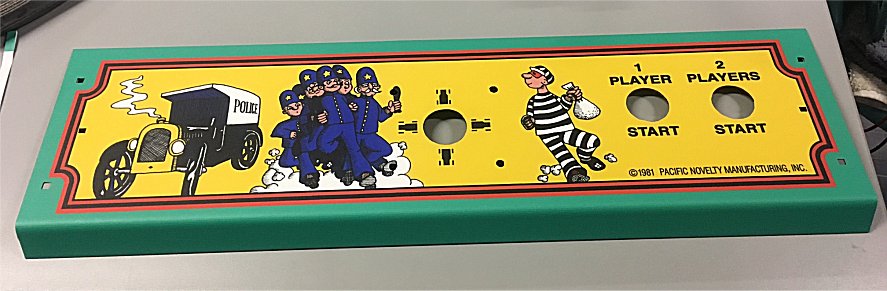
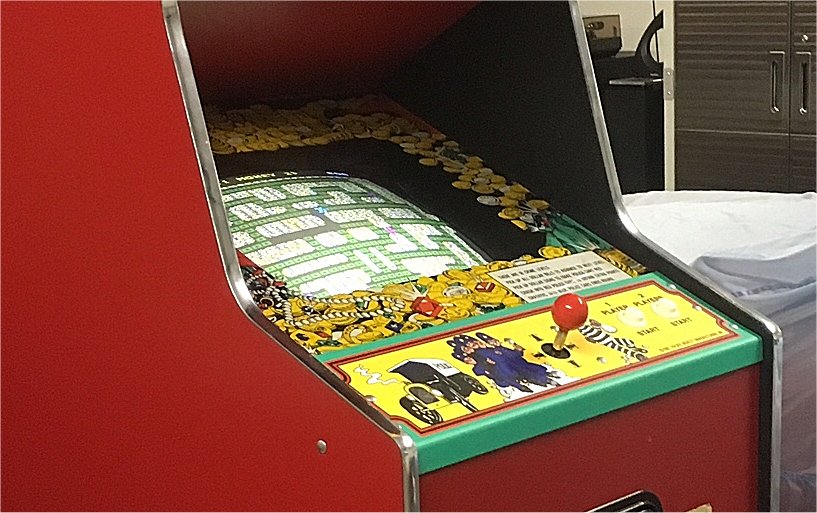
did the "Sen The control panel overlay (CPO) was completely worn off. Thankfully, Rich of This Old Game makes a high quality replacement, which was made by duplicating a New Old Stock original. Needless to say I immediately ordered one. I first removed and disassembled the entire control panel. I then separated the metal control panel from the rest of the parts and prepped it by removing any traces of the old overlay as well as any possible remaining adhesive, dirt or grime. I sanded the top surface with 80 grit sandpaper to give a good 'tooth' for the primer coat. The underside of the panel was carefully wet sanded with 800 grit sandpaper to preserve the original galvanized finish, as I did not want to alter or paint that side. Finally I primed and painted the top of the metal control panel. Since this particular overlay does not come with any precut holes I had to carefully line it up before gluing it down. In order to preserve the alignment I made sure to cut the three main holes prior to the final installation of the CPO. You have to take great care in cutting the joystick hole because the trimmed edge is in plain sight when the entire control panel is reassembled. I cleaned up the original joystick and bolts and reassembled all the parts. After I made some custom fabricated control panel brackets (one was missing and the other was a hacked up piece of metal) I reinstalled the control panel back on the game. It looks fantastic! |
 |
Calling all cars! I see a nicely restored Thief! |